


How do I partially fulfill or ship a sales order in inFlow Cloud?
If you have a sales order that you’re not going to fully ship, inFlow can help record which products you’re taking off the shelf today, and also tell you exactly when these products were moved. Here’s how to start!
Windows
inFlow Cloud for Windows
Partial fulfill (for orders without shipping)
If you don’t ship your sales orders, keep shipping turned off. You’ll see a Fulfill tab along the bottom of the order screen.
Any product going out right away to your customer should be added to this tab, and inFlow Cloud will automatically assign it with a Fullfill Date that matches the current date.
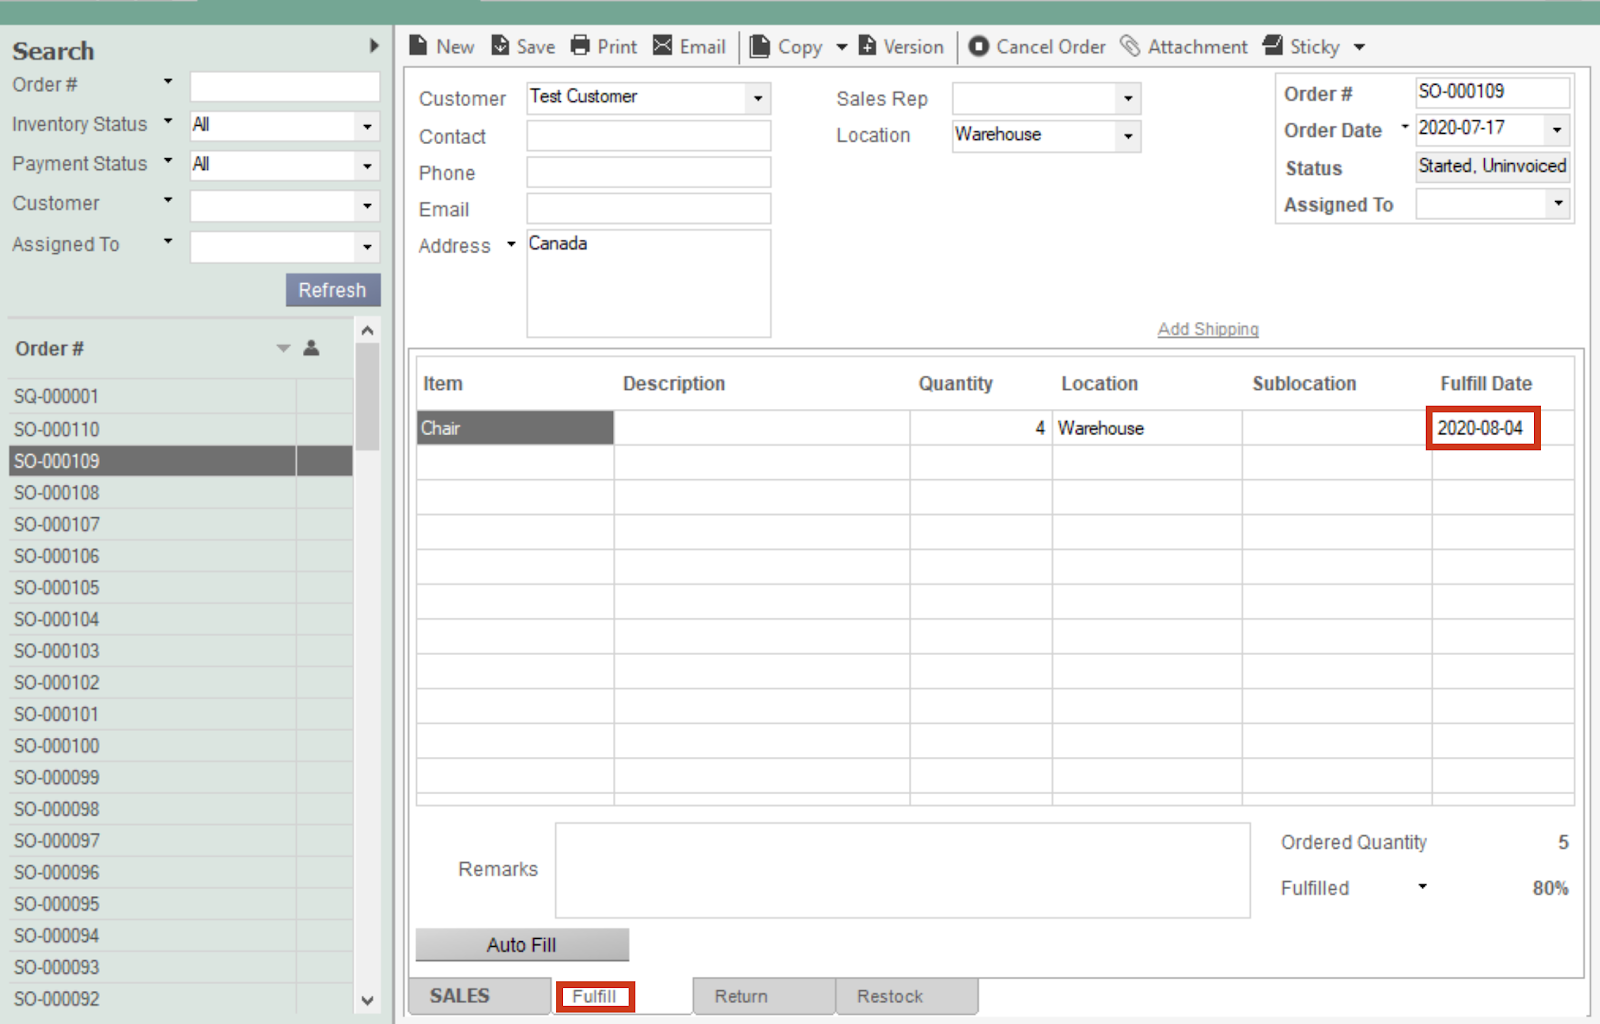
If you don’t provide all of the products on that order at once, the Fulfill Date can be helpful because it shows exactly when a product was taken out of stock and given to your customer. This makes it easier to review large orders that may have been fulfilled over a period of days or weeks.
Partial ship (for orders that have shipping)
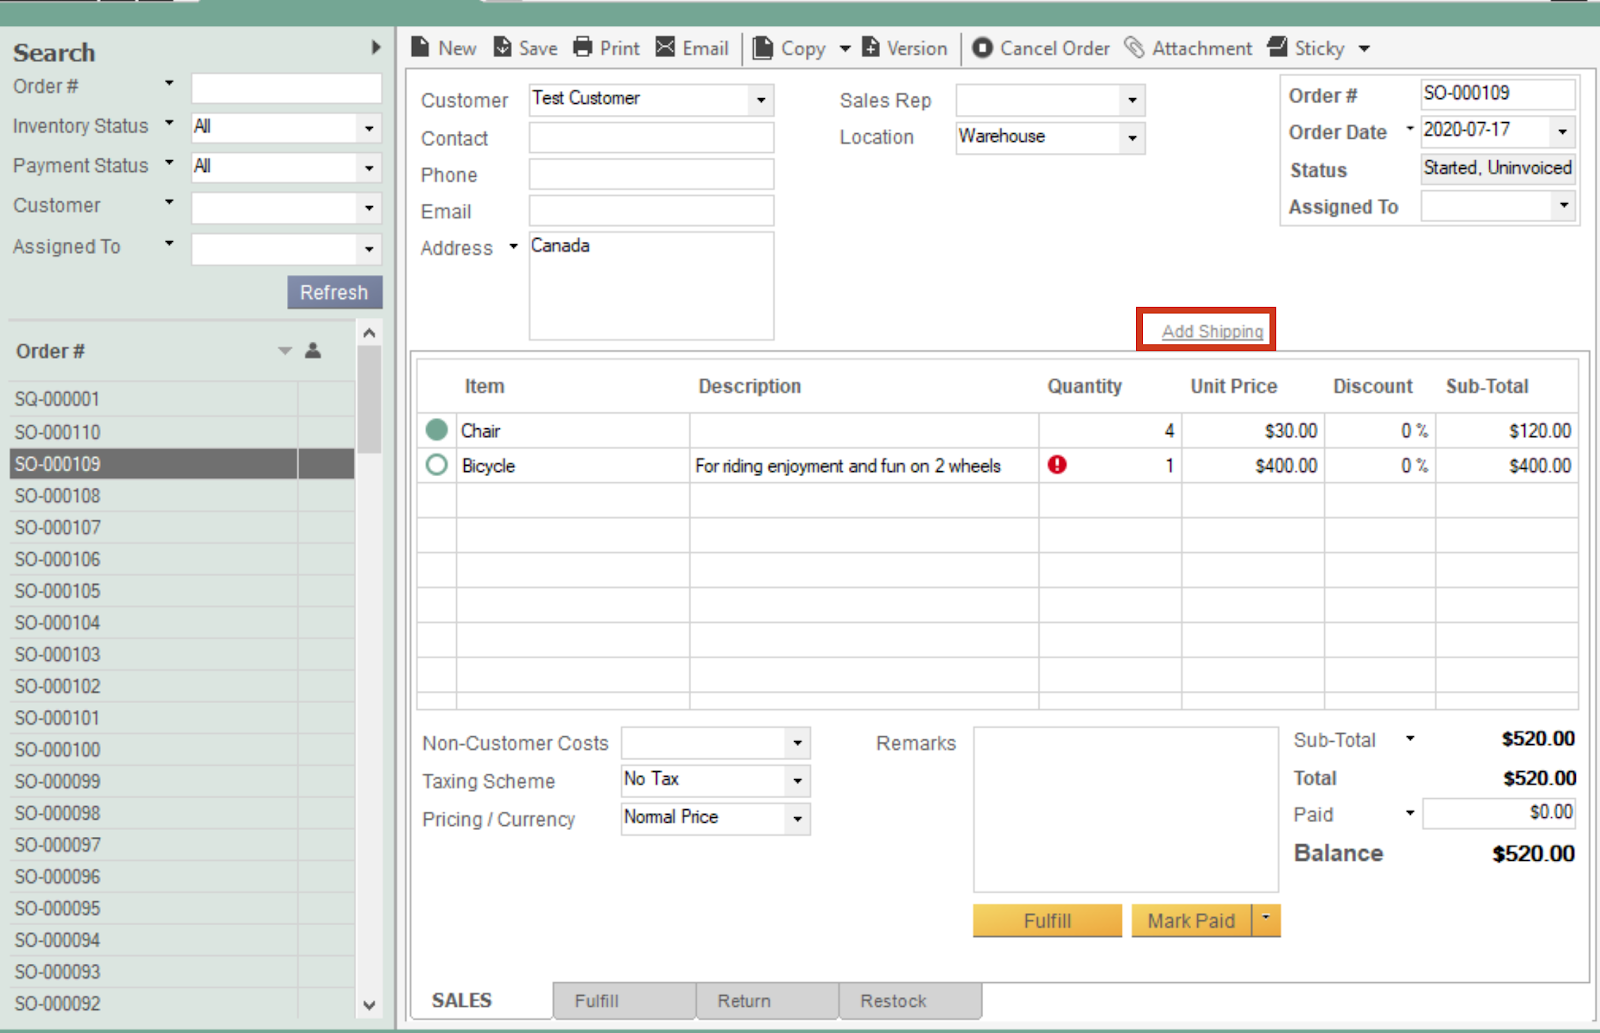
If you ship your orders then you’ll want to Add Shipping to your order. You’ll see this in the main SALES tab toward the top-right corner. With shipping turned on, you’ll see a Pick and Ship tab at the bottom of your sales order screen.
Each time a product is added to the Pick tab, it will be assigned a Pick Date (which matches the current date) to reflect when it was taken off of the shelves and made ready for shipping.
It’s important to note that inFlow Cloud doesn’t adjust your Quantity on Hand until it has been shipped — so if you’re trying to track when an item was removed from inventory on an order that has shipping, you’ll want to look at the Shipped Date available in the Ship tab.

Invoicing partial orders
If you want to invoice as you ship, then please review our article on back-ordered items.
If you plan to invoice only once all items have been shipped, you’ll want to follow the steps below:
- Create your sales order and select the items your customer has ordered.
- Click the Pick tab and select the items that are to be shipped out.
- Move on to the Ship tab and click Auto Fill. Only items which have been picked will appear and you can record which box each item has been packed into.
- Add any details such as tracking number/ carrier in the Shipping Details link at the bottom of the tab.
This order status will now appear as Started (at the top right) and when you’re ready to ship out another batch of items, simply go back to the pick tab and repeat steps 3-4 as many times as necessary to ship all items out. When all the items have been shipped the status of the order will change to Fulfilled.
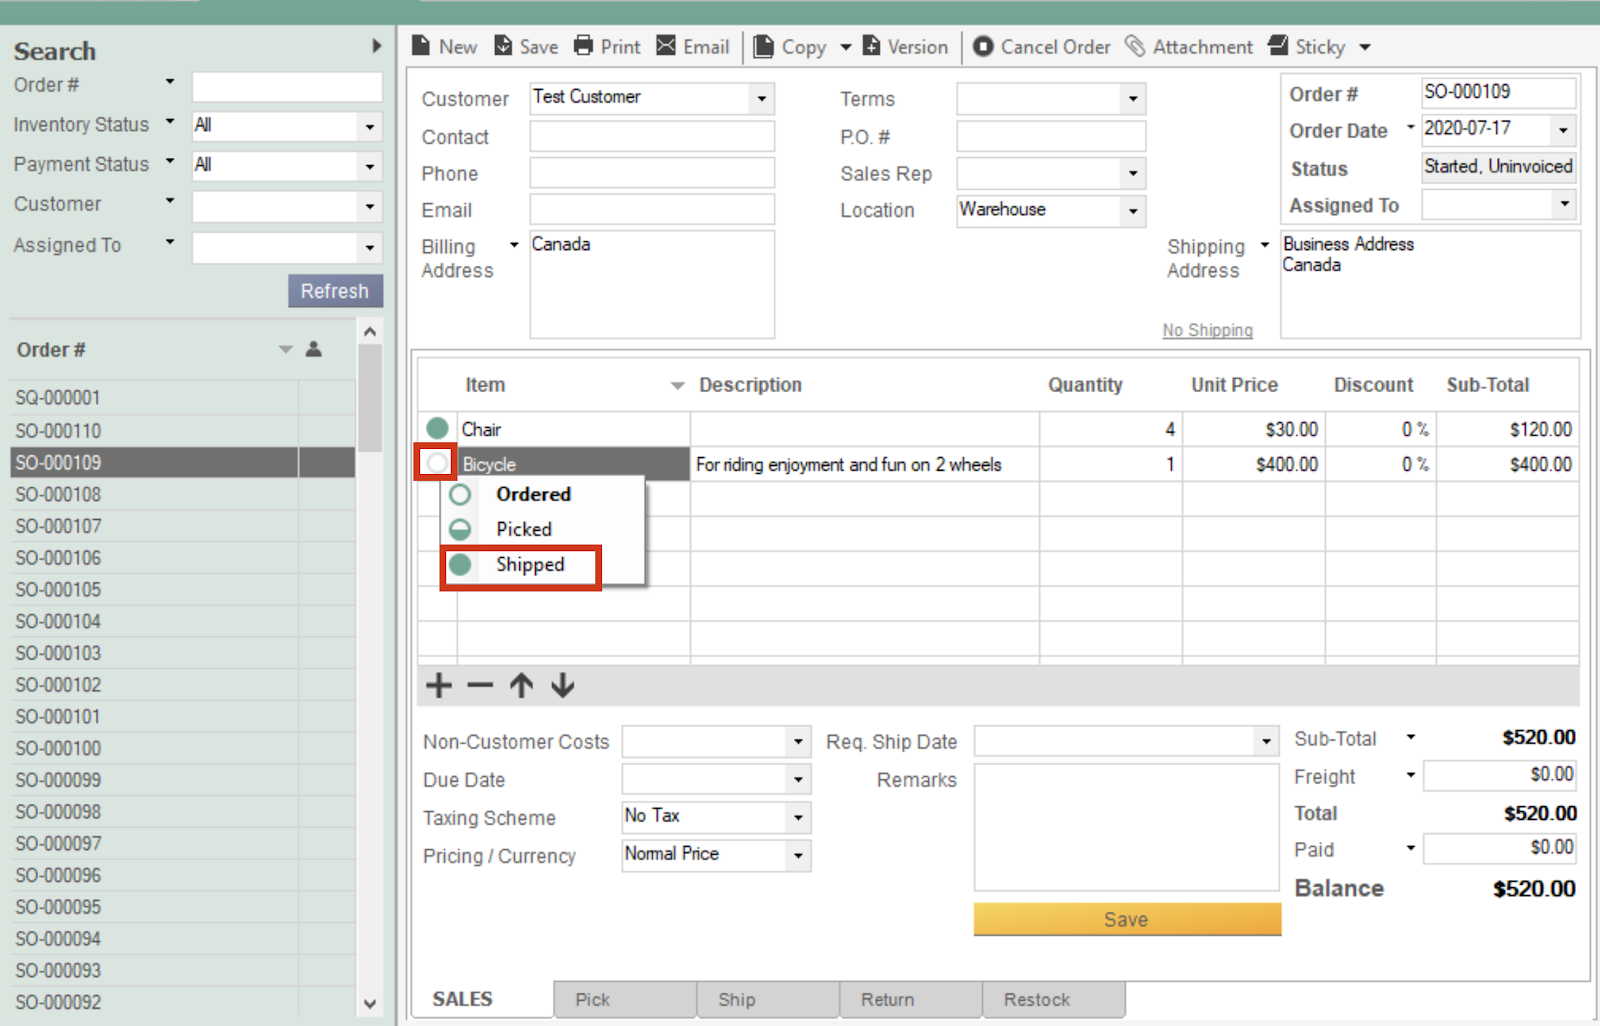
Another way to quickly choose which items have been shipped is to click the green circle beside the item and select Shipped. You can easily do that from the Sales tab on an item that has not been shipped yet.
Web
inFlow Cloud for Web
Partial fulfill (for orders without shipping)
If you don’t ship your sales orders, keep shipping turned off. You’ll see a Fulfill tab instead of a pick and ship tab along the top.
Any product going out right away to your customer should be added to this tab, and inFlow Cloud will automatically assign it with a Fulfill Date that matches the current date.

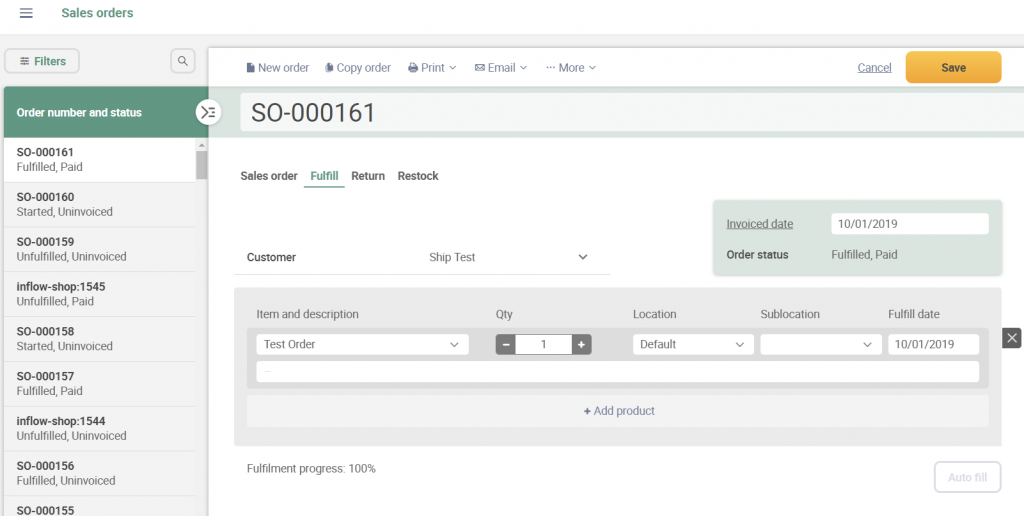
If you don’t provide all of the products on that order at once, the Fulfill Date can be helpful because it shows exactly when a product was taken out of stock and given to your customer. This makes it easier to review large orders that may have been fulfilled over a period of days or weeks.
Partial ship (for orders that have shipping)
If you ship your orders then you’ll want to include Shipping to your order. You’ll see this in the main SALES tab toward the top-right side. With shipping turned on, you’ll see a Pick and Ship tab at the top of your sales order screen.

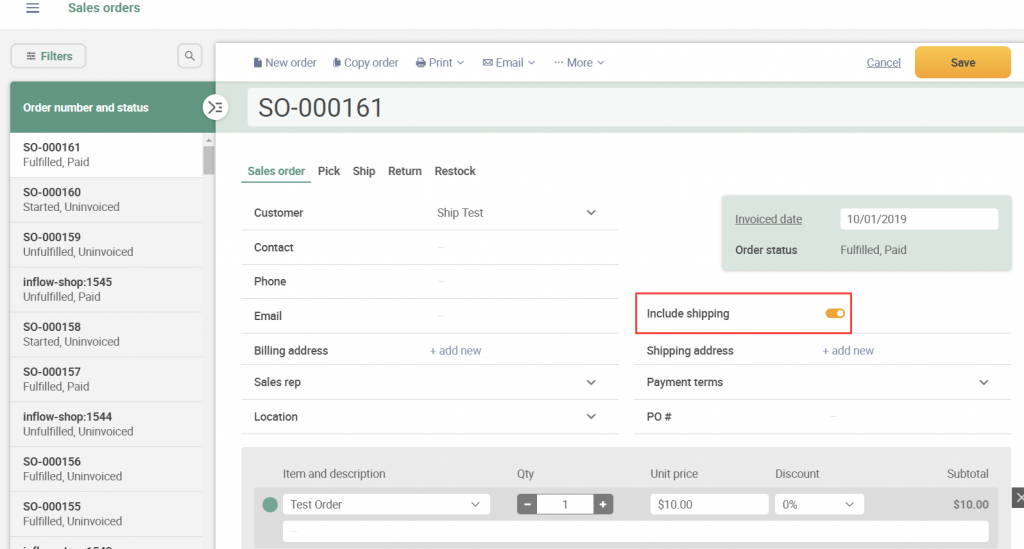
Each time a product is added to the Pick tab, it will be assigned a Pick Date (which matches the current date)to reflect when it was taken off of the shelves and made ready for shipping.
It’s important to note that inFlow Cloud doesn’t adjust your Quantity on Hand until it has been shipped — so if you’re trying to track when an item was removed from inventory on an order that has shipping, you’ll want to look at the Shipped Date available in the Ship tab.
Invoicing partial orders
If you want to invoice as you ship, then please review our article on back-ordered items.
If you plan to invoice only once all items have been shipped, you’ll want to follow the steps below:
- Create your sales order and select the items your customer has ordered.
- Click the Pick tab and select the items that are to be shipped out.
- Move on to the Ship tab and click Auto Fill. Only items which have been picked will appear and you can record which box each item has been packed into.
- Add any details such as tracking number/ carrier in the Shipping Details link at the bottom of the pick list.
This order status will now appear as Started (at the top right) and when you’re ready to ship out another batch of items, simply go back to the pick tab and repeat steps 3-4 as many times as necessary to ship all items out. When all the items have been shipped the status of the order will change to Fulfilled.
Another way to quickly choose which items have been shipped is to click the green circle beside the item and select Shipped. You can easily do that from the Sales tab on an item that has not been shipped yet.


0 Comments